How to Make a Heart Cake? There’s something undeniably charming about a heart-shaped cake. Whether you’re celebrating a romantic anniversary, Valentine’s Day, or even a milestone birthday, this dessert sends a message of love and thoughtfulness. But how do you create one without it turning into a Pinterest fail? Don’t worry—this guide will walk you through every step of making a heart cake that looks amazing and tastes even better. So, let’s dive into the first part of this sweet adventure!
Introduction to Heart Cakes
Why Heart Cakes Are Perfect for Special Occasions
Have you ever wondered why heart cakes are so popular for special moments? Well, think about it: the heart symbolizes love, care, and connection. Therefore, when you present someone with a heart-shaped cake, it’s like saying, “I baked my feelings into this!” ❤️
Heart cakes are more than just desserts—they’re edible love letters. Moreover, they’re ideal for romantic partners, best friends, or even family members. This thoughtful gesture can easily turn an ordinary event into something extraordinary. Plus, let’s face it—they’re Instagram gold!
The Symbolism Behind Heart-Shaped Desserts
The heart shape isn’t just cute; it’s iconic. From ancient art to emojis, the heart has always been a universal sign of affection. For this reason, baking a heart cake blends tradition with creativity. And let’s be honest—who wouldn’t love a dessert that’s literally shaped like love? 💖
Essential Tools and Ingredients
Baking Tools You’ll Need
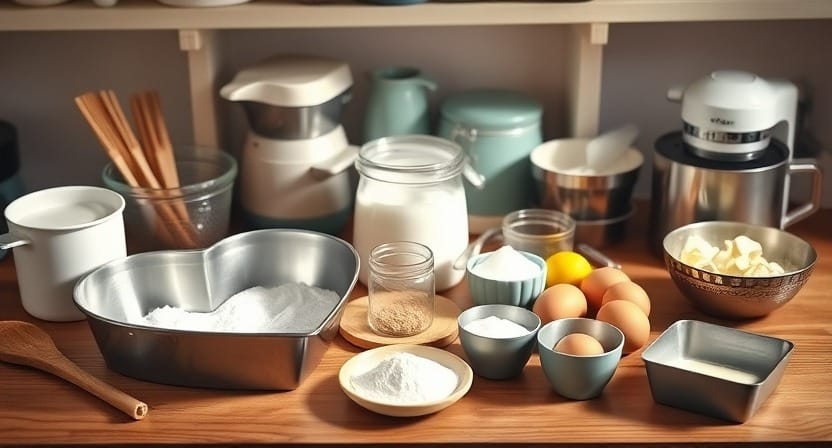
Before you get started, let’s make sure your baking arsenal is fully stocked. To begin with, here’s a quick checklist:
- Heart-shaped cake pan: This is the MVP of the project. But don’t worry if you don’t have one—I’ll share a trick later. 😉
- Mixing bowls: You’ll need at least two for wet and dry ingredients.
- Electric mixer or whisk: Because no one wants to mix batter by hand for hours.
- Spatula: Perfect for scraping every last bit of batter.
- Cooling rack: Essential for avoiding a soggy bottom.
- Parchment paper: Your best friend for non-stick success.
Ingredients for a Basic Heart Cake
Now that you’ve got the tools, let’s move on to the ingredients. Here’s a simple recipe to get started. However, feel free to jazz it up later with your own flavor twists!
- Flour (2 ½ cups)
- Sugar (2 cups)
- Eggs (4 large)
- Butter (1 cup, softened)
- Baking powder (2 tsp)
- Milk (1 cup)
- Vanilla extract (1 tsp)
- Salt (a pinch)
Optional: Food coloring for a pop of red or pink! 🎨
“Pro Tip: Always use room-temperature ingredients for a smoother batter and a more evenly baked cake!”

Preparing for the Baking Process
Tips for Choosing the Right Heart-Shaped Pan
If you’re lucky enough to have a heart-shaped pan, great! However, if not, don’t stress. Here’s a little hack: use one square pan and one round pan. Once the cakes are baked, simply cut the round cake in half and position the pieces alongside the square one to form a heart. Voilà—problem solved!
Preparing Your Workspace
Baking is an art, but it’s also a science. For this reason, organization is key. Make sure you:
- Preheat your oven to 350°F (175°C).
- Grease and flour your pans or line them with parchment paper.
- Measure your ingredients in advance—this isn’t the time for a guessing game.
- Clear your counter space for easy movement.
Think of your kitchen as your stage, and you’re the star baker. So, are you ready to perform? Let’s keep going!
Step-by-Step Guide to Baking a Heart Cake
Making the Batter: The Foundation of Your Cake
To start, cream the butter and sugar until it’s light and fluffy. This step is crucial for a soft, airy cake. Then, add the eggs one at a time, mixing well after each addition.
Next, alternate adding the dry ingredients (flour, baking powder, and salt) and the wet ingredients (milk and vanilla). Be careful not to overmix—it can lead to a dense cake instead of a light, spongy one.
“Batter consistency tip: It should be smooth but not runny, like a thick pancake mix.”
Shaping the Cake: Tricks for Perfect Edges
Pour the batter into your prepared pans, filling them about ¾ of the way. If you’re using the square-and-circle hack, divide the batter evenly between the two. Then, use a spatula to smooth out the surface for even baking.
Baking Time and Temperature Guidelines
Bake your cakes for about 30-35 minutes. In the meantime, keep an eye on them—your nose will tell you when they’re close! To check doneness, insert a toothpick in the center; if it comes out clean, you’re golden.
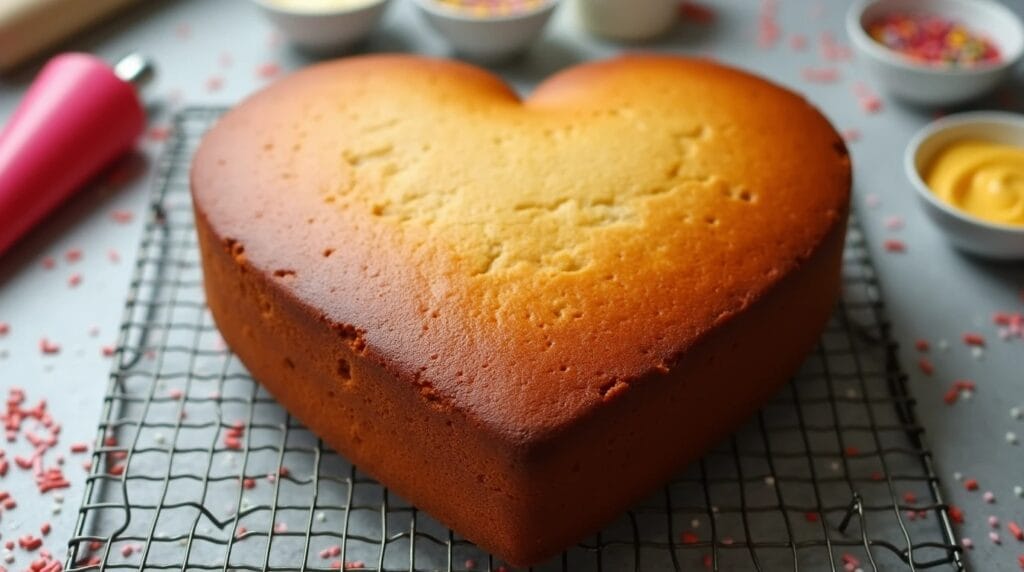
Once baked, let them cool in the pans for 10 minutes. After that, transfer them to a cooling rack. Trust me, this step is crucial—rushing it might lead to a crumbling disaster. 😅

Common Problems and Solutions
Even with the best intentions, baking isn’t always smooth sailing. Sometimes, things don’t go as planned. But don’t worry; I’ve got you covered! Let’s tackle some common issues that might arise when baking a heart cake and how to fix them.
Uneven Baking: How to Fix It
Have you ever pulled a cake out of the oven, only to find one side is higher than the other? This is a common problem, especially when working with uniquely shaped pans like a heart. But the good news is, it’s fixable!
Why it happens: Uneven batter distribution or an improperly leveled oven can cause this.
The fix:
- Before baking, ensure your batter is evenly spread in the pan. Use a spatula to smooth out the top, especially in the crevices of the heart shape.
- If one side still comes out higher, simply trim the uneven part with a serrated knife once the cake has cooled. Think of it as giving your cake a little haircut!
“Pro Tip: Rotate your pan halfway through baking to encourage even heat distribution.”
Preventing Sticking: Tips for a Clean Removal
One of the most heart-wrenching moments in baking is when your beautiful cake refuses to leave the pan. Let’s make sure that doesn’t happen.
Why it happens: Sticky spots can form if the pan isn’t properly prepared, or if the cake hasn’t cooled enough before removal.
The fix:
- Prep your pan like a pro: Grease it thoroughly with butter or non-stick spray, then dust with flour or line it with parchment paper.
- Patience pays off: Let the cake cool for at least 10 minutes in the pan before attempting to remove it. For stubborn cases, run a knife along the edges to loosen it gently.
💡 “Think of your cake like a diva—it needs a little pampering before it’s ready for its big reveal!”
Achieving the Perfect Texture
Is your cake too dense or too dry? Let’s troubleshoot.
Why it happens: Overmixing the batter or measuring ingredients inaccurately can ruin your cake’s texture.
The fix:
- Use the “scoop and level” method for measuring dry ingredients to avoid packing too much flour.
- Mix the batter just until combined; overmixing can develop too much gluten, making the cake dense.
- For moisture, consider adding a tablespoon of yogurt or sour cream to the batter. This simple tweak can work wonders!
“Baking is like a relationship—too much or too little effort, and things fall apart. Balance is key!”
Decorating Your Heart Cake
Now comes the fun part—decorating! This is where you get to showcase your creativity and turn your cake into a showstopper. Whether you’re a beginner or a decorating pro, I’ve got tips for every skill level.
Basic Decoration Ideas for Beginners
If you’re new to cake decorating, don’t sweat it. Simplicity can still be stunning!
- Frosting magic: Use a spatula to spread a smooth layer of buttercream or whipped cream over your cake. The key is to work in sections and keep your strokes even.
- Sprinkle love: Add a handful of sprinkles, edible glitter, or colored sugar for an instant pop of color.
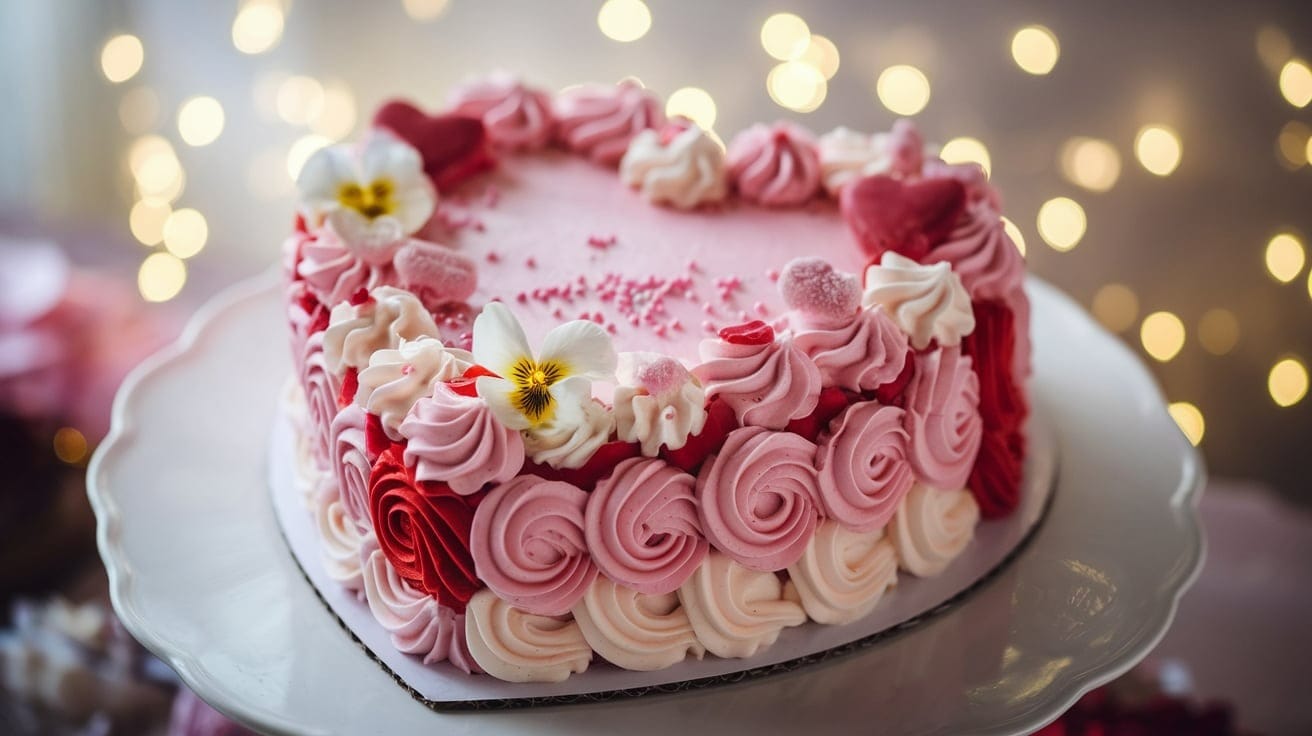
- Minimalist chic: Pipe a few rosettes or write a short message with a piping bag.
Advanced Techniques: Using Fondant and Piping
Ready to take it up a notch? Let’s talk advanced techniques.
- Fondant finesse: Roll out fondant and drape it over your cake for a polished, professional look. Smooth it out with a fondant smoother to get rid of air bubbles.
- Piping power: Use a piping bag fitted with decorative tips to create borders, flowers, or intricate designs. The possibilities are endless!
Adding Personal Touches for a Memorable Design
Your cake should tell a story! Personalize it with elements that reflect the occasion or the recipient. For example:
- For Valentine’s Day, add candy hearts or a chocolate drizzle. 🍫
- For an anniversary, incorporate the couple’s initials in frosting.
“Decorating is your chance to let your personality shine—so don’t hold back!”

Flavor Variations for Heart Cakes
Why stick to vanilla when there’s a whole world of flavors out there? Let’s explore a few delicious options.
Classic Vanilla Heart Cake
This one’s a crowd-pleaser. Stick to the basic recipe, but consider adding a teaspoon of almond extract for a subtle twist.
Decadent Chocolate Heart Cake
For the chocolate lovers, substitute ½ cup of flour with cocoa powder in the original recipe. To make it extra indulgent, add chocolate chips or a ganache topping.
Fruity Twists: Strawberry and Raspberry Options
For a fruity spin, puree fresh strawberries or raspberries and fold them into the batter. This adds both flavor and a natural pink hue, perfect for a heart-shaped dessert. 🍓
Serving Your Heart Cake
After all the effort you’ve poured into baking and decorating, it’s finally time to present your heart cake. However, how you serve it can elevate the experience even further. Here are some tips to help you leave a lasting impression.
Presentation Tips for a Stunning Display
The way you present your cake can make or break its wow factor. Therefore, taking a little extra time to prepare your display is well worth it.
- Choose the right platter: A cake stand or decorative plate can instantly add elegance. Furthermore, for romantic events, soft pastel tones or floral patterns work beautifully.
- Add garnishes: Surround your cake with decorative elements such as fresh flowers, vibrant berries, or even artisanal chocolates. Consequently, these additions will give your dessert a professional look.
- Clean edges: Finally, use a damp cloth to wipe any frosting smudges or stray crumbs from the platter. After all, presentation is all about the details!
💡 “Think of your platter as the red carpet—your cake deserves to be the star attraction!”
Pairing Your Cake with Drinks or Desserts
To create a well-rounded experience, think about what drinks or side dishes would complement your cake. Here are some suggestions:
- Coffee or tea: Pair a vanilla or chocolate heart cake with a warm beverage for a cozy vibe. Additionally, flavored teas like Earl Grey or chamomile work wonderfully.
- Champagne: For celebratory events, champagne adds a touch of sophistication. Moreover, its light, bubbly nature balances the sweetness of the cake.
- Fruit salads: If you’re looking to balance the richness of the cake, serve a simple fruit salad on the side. Consequently, it adds a refreshing element to your dessert table.
“The right pairing can transform your cake from a delicious treat into an unforgettable experience!”
Heart Cake Ideas for Different Occasions
Heart cakes are incredibly versatile, which means they can be customized to suit almost any celebration. Let’s explore some creative ideas for various events.
Valentine’s Day Heart Cake
Valentine’s Day and heart cakes are a match made in dessert heaven. To create a festive vibe, opt for red or pink frosting, sprinkle candy hearts on top, or decorate with edible roses. Additionally, you can add a drizzle of chocolate or write a sweet message like “Be Mine.”
Anniversary Celebrations
Anniversaries are all about celebrating love, so a heart cake is the perfect centerpiece. For a sophisticated touch, consider using fondant and edible gold accents. Alternatively, you can personalize the cake with the couple’s initials or the number of years they’ve been together.
Birthdays and Other Milestones
Heart cakes aren’t just for romantic occasions—they’re great for birthdays too! For kids, go bold with bright colors, fun patterns, or even a cartoon theme. On the other hand, for milestone celebrations like graduations or promotions, opt for classy designs and flavors that reflect the occasion.
“A heart cake isn’t just a dessert—it’s a way to say, ‘This moment is special, and so are you!’”
Frequently Asked Questions About Heart Cakes
As you embark on your heart cake journey, you might have a few questions. Don’t worry—I’ve got answers to some of the most common queries.
Can I Make a Heart Cake Without a Special Pan?
Absolutely! In fact, you can easily create a heart shape without investing in a specialty pan. Here’s how:
- Use one square pan and one round pan. After baking, cut the round cake in half.
- Then, position the two halves along two sides of the square cake to form a heart.
- Finally, secure the pieces with frosting for a seamless look.
This trick is simple, cost-effective, and produces impressive results.
How Far in Advance Can I Bake a Heart Cake?
You can bake your heart cake up to two days in advance. However, to ensure the best taste and texture, decorate it as close to the event as possible.
- Storage tips: Wrap the cooled cake layers tightly in plastic wrap to keep them moist.
- Day-of frosting: Apply the frosting and decorations a few hours before serving for maximum freshness.
By planning ahead, you can enjoy a stress-free baking experience while still wowing your guests.
Discover a step-by-step guide to Making a Heart-Shaped Cake at Home for tips and tricks to perfect this delightful dessert. For creative inspiration, explore Heart-Shaped Cake Decorating Ideas and elevate your cake’s design. Additionally, check out the Best Way to Serve a Heart-Shaped Cake to make a stunning presentation. Lastly, ensure your creation arrives safely with our tips on How to Transport a Cake Safely.
Conclusion: Celebrate Love and Sweet Moments with a Heart Cake
In conclusion, making a heart cake is more than just following a recipe—it’s about creating something with love and care. From gathering the right tools to perfecting your presentation, every step is an opportunity to show how much you care.
So, why wait? Roll up your sleeves, preheat that oven, and get baking! Whether it’s for a romantic Valentine’s Day, an anniversary celebration, or just a way to brighten someone’s day, a heart cake is the perfect way to spread joy and sweetness. ❤️
“At the end of the day, it’s not just about the cake—it’s about the love and effort baked into every slice.”

Heart Cake
Ingredients
Method
- Preheat your oven to 350°F (175°C).
- Grease and flour your heart-shaped pan or line it with parchment paper.
- Cream together butter and sugar until light and fluffy.
- Add the eggs one at a time, mixing well after each addition.
- Alternate adding the flour, baking powder, salt, and milk, mixing gently until just combined.
- Pour the batter into the prepared pans, filling them about ¾ full.
- Bake for 30-35 minutes or until a toothpick inserted into the center comes out clean.
- Let the cakes cool in the pans for 10 minutes before transferring to a cooling rack.
- Once cooled, frost the cake with buttercream or whipped cream.
- Decorate with sprinkles, candy hearts, or personalize with a short message.
